CDS Tactical Products​
  • Store
  • Blog
  • Product Registration
  • Contact
  • Blog

Remington Single Point Sling Attachment Installation Procedure

12/6/2015

0 Comments

 
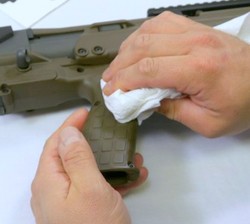
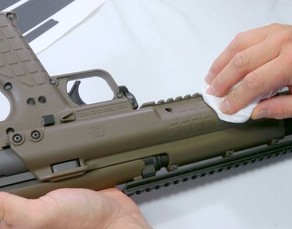
Thank you for purchasing our Remington ambidextrous Single Point Sling Attachment. Please read the instructions below prior to installation.
Prior to installation make sure the firearm is unloaded, and that you follow all standard firearms safe handling procedures.
Picture
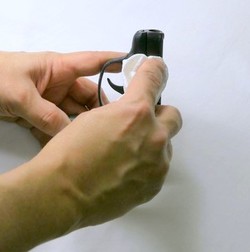
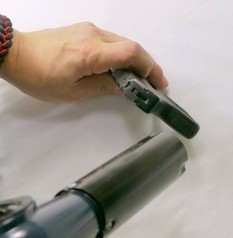
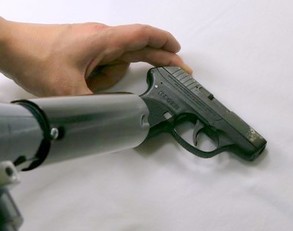
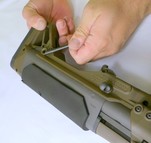
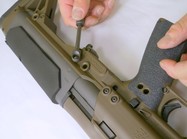
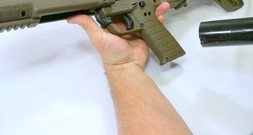
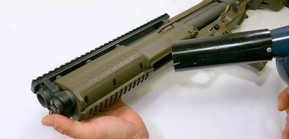
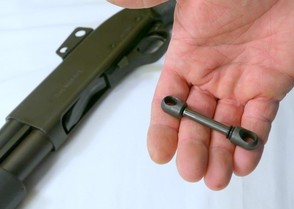
Single Point Sling Attachment (SPSA) shown out of packaging.
Picture
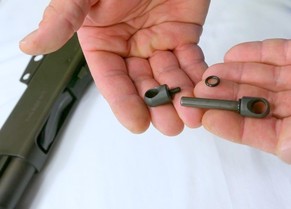
1) Unscrew removable eye and remove (1) o-ring from shaft.
Picture
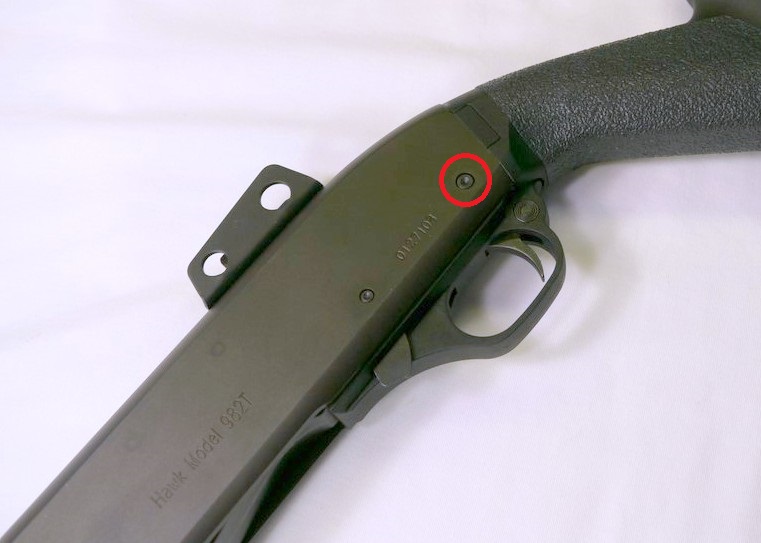
2) Locate rear trigger housing pin, direct above trigger. The SPSA will replace this pin.

Read More
0 Comments

Ruger LCP Grip Wrap Installation Instructions

12/4/2015

1 Comment

 
Thank you for purchasing CDS Tactical Products new Gen 2 Ruger LCP Grip Wrap. Please read the instructions below prior to application.

Prior to installation make sure the firearm is unloaded, and that you follow all standard firearms safe handling procedures.
Picture
Picture
1) Clean wrap installation areas with a lint free cloth and a cleaner that will not leave a residue behind. An alcohol wipe works great for this. 

2) It is recommended that you try the fit of the cut out wrap to the area it will be applied with the backer still affixed.

Picture
Picture
3) Gently warm the area of the firearm where you will be applying the wrap to. This will allow the wrap to conform to irregular surfaces on the firearm. Surfaces only need to be warmed.  ​

Read More
1 Comment

Kel-Tec KSG Stainless Steel Magazine Follower Upgrade Installation Procedure

11/29/2015

1 Comment

 
Thank you for purchasing CDS Tactical Products Kel-Tec KSG stainless steel magazine follower upgrade. Please read the instructions below prior to installation.
Prior to installation make sure the firearm is unloaded, and that you follow all standard firearms safe handling procedures.
Follow the dis-assembly instructions provided in the Kel-Tec safety, instruction and parts manual included with your KSG.
Steps below are for reference only, Kel-Tec manual takes precedent. 
Picture
1) Check to verify the KSG is not loaded.
Picture
2) Remove rear take down pin.
Picture
3) Remove forward take down pin or single point sling attachment.

Read More
1 Comment

Kel-Tec KSG Grip Wrap Gen 2 Now For Sale!

11/21/2015

0 Comments

 
CDS Tactical Products is pleased to announce the release of our Gen 2 grip wrap for the Kel-Tec KSG pump action bull-pup shotgun.

Some of the features found on our KSG grip wrap are:
  1. ​Fore-grip wraps now cover twice the area vs Gen 1.
  2. Total wrap coverage area increased by over 12 square inches from Gen 1, more material = better control over your firearm.
  3. Grip wrap back-strap is now a separate, longer piece with "V" notches to aid installation and provide a better user experience. 
  4. Main wrap panel modified to extend coverage higher on the grip, "V" notches also added to aid instillation and UX.
  5. All square corners replaced with radii to reduce chances of tearing.
  6. Made from a low profile rubber like material adding only an additional .018" thickness to surfaces that it is applied to. With the material thickness being so thin it minimizes the interference with holsters, belts and clothing.
  7. Installation is aided by a repositionable pressure sensitive adhesive backing. This adhesive will leave little to no residue behind should you chose to remove the wrap.
  8. Available in your choice of Black, Black or Black and looks great on all color firearms.
  9. Easy to follow on-line instructions located here.
  10. First grip to be redesigned to carry our new (1) year warranty.

As always this grip, is designed, manufactured & packaged with pride in Keene, NH with American made materials. 

Pickup one for your KSG today at our store!


Picture
Picture
0 Comments

Kel-Tec KSG Grip Wrap Installation Instructions

11/21/2015

0 Comments

 
Thank you for purchasing CDS Tactical Products new Gen 2 Kel-Tec KSG Grip Wrap. Please read the instructions below prior to application.
Prior to installation make sure the firearm is unloaded, and that you follow all standard firearms safe handling procedures.
Picture
Picture
1) Clean wrap installation areas with a lint free cloth and a cleaner that will not leave a residue behind. An alcohol wipe works great for this. 

2) It is recommended that you try the fit of the cut out wrap to the area it will be applied with the backer still affixed.
Picture
Picture
3) Gently warm the area of the firearm where you will be applying the wrap to. This will allow the wrap to conform to irregular surfaces on the firearm. Surfaces only need to be warmed.  


Read More
0 Comments

New (1) Year Warranty On Select Grip Wraps

11/21/2015

0 Comments

 
CDS Tactical Products is now offering a (1) year warranty on select grip wrap models. We are reviewing all of our existing designs, making improvements and will offer a warranty on them when the re-design is completed.

The warranty along with the terms and conditions can be viewed here.
0 Comments
Forward>>
CDS Tactical Products
​51 Ralston St. Suite 11

Keene, NH 03431


team@cdstactical.com
Copyright © 2017